butterfly主题配置
文档地址
Find Icons with the Perfect Look & Feel | Font Awesome
将 butterfly/_config.yml 文件复制,重命名为 _config.butterfly.yml 放在 hexo 根目录下,在这个文件里做修改
命令:hexo clean && hexo g && hexo d 上传主题,验证是否修改成功。
参考
极简的 Obsidian + Hexo + dev container + cloudflare page 工作流 备忘录 | Yi-Ting’s Blog
主题素材
本地图片
在根目录的 source 文件夹下创建 img 文件夹,包含 web 和 blog 两个文件夹,网站图片使用 /img/web/xx.jpg,博客图片使用 ,并把 butterfly 主题文件夹下的 img 文件夹剪切到 /img/web 文件夹下
FontAwesome 图标本地加载
由于 all.min.css 下载 woff 文件较慢所以改为本地加载
首先注释掉 themes\butterfly\plugins.yml 中的以下代码
1 | #fontawesomeV6: |
再从 这个网站 下载 css/all.min.css 和 webfonts 文件夹
下载好后将 all.min.css 拷贝到 themes\butterfly\source\css 目录中,将 webfonts 文件夹拷贝到 themes\butterfly\source 目录中
最后引入 css
1 | inject: |
使用阿里图标与此类似 Hexo-使用阿里iconfont图标 - MoYu-zc - 博客园 (cnblogs.com)
解决 cdn.jsdelivr.net 国内无法加载
使用 cdn.jsdelivr.net 未受污染的子域:
fastly.jsdelivr.net,由 Fastly 提供 本站使用gcore.jsdelivr.net,由 G-Core 提供testingcf.jsdelivr.net,由 CloudFlare 提供
将博客主题的文件中 jsDelivr 链接里的cdn替换为子域名即可
比如 butterfly 主题中将
themes\butterfly\layout\includes\head\preconnect.pug和themes\butterfly\scripts\events\cdn.js中的cdn.jsdelivr.net替换为fastly.jsdelivr.net
查看网页加载的大小和时间
右键点击网页,选择 “ 检查 “,(直接按 ctrl+shift+I 也可以)。
出来的界面上,点击 “Network”,按 Ctrl+R,就可以看到每个资源的大小和加载时间
进一步分析:点击特定请求,可以查看更详细的信息,如请求头、响应头、传输大小等。通过分析这些信息,你可以确定加载时间较长的资源,并找出导致问题的原因。
外挂 Css
在 themes\butterfly\source\css 目录中添加 my.css,添加需要的 css
1 | /* 滚动条 */ |
最后引入 css
1 | inject: |
分割线图标更换
本次修改基于 Butterfly 主题 3.0.0 !
将图标更换为 “ 太空飞船 “。
修改 butterfly 主题配置文件 _data–_config.yml :
1 | hr_icon: |
icon-top 常用数值:
-20px:图标位于分割线上方
-10px:图标位于分割线中间
0px:图标位于分割线下方
本地搜索
安装 hexo-generator-searchdb 搜索插件
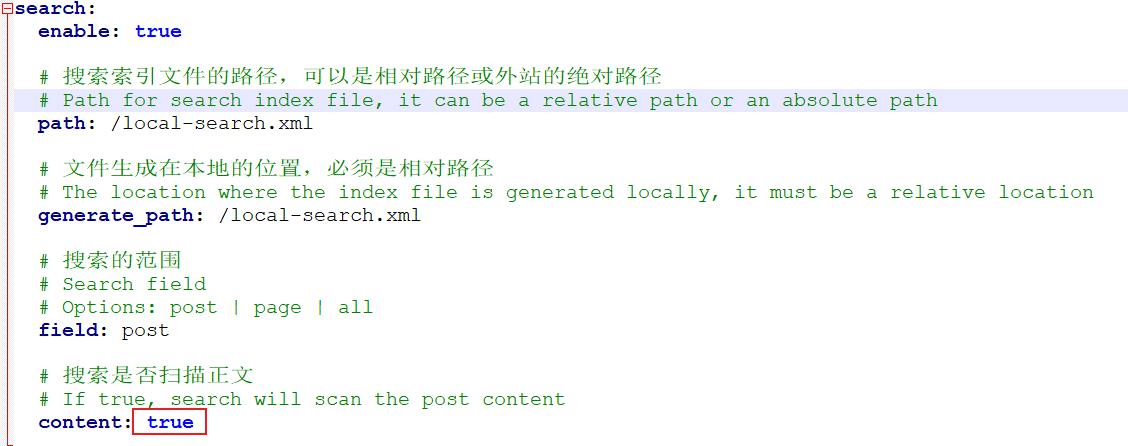
修改配置文件:
找到 local_search 将 enable 修改为 true
加速方案
减少索引内容
- 可以设置搜索内容,若仅搜索标题 (搜索内容 content 设置为 false) 则会加载快到飞起

外链加速
打开主题下的 local-search.js 文件 (不同主题的位置会不同, 但是一般都在 source/js 这种文件夹里) , 找到如下字段
url: GLOBAL_CONFIG.root + path 改成 url: 外链
外链推荐使用 Jsdelivr 的 cdn (引用 Github 的资源, 不需要手动更新, 速度也挺快)
评论
使用 Valine 添加评论功能
注册账号并进入:LeanCloud
创建开发版应用:
创建后点击设置进入应用:
复制 AppID、AppKey
修改主题配置文件
找到 valine,分别将复制的 id 和 key 填入,开启评论需要在 comments-use 中填写你需要的评论。
Giscus 评论系统设置
安装 Giscus
点击这个链接安装:**GitHub Apps - giscus**
配置仓库 Discuss 部分
首先打开仓库的 setting,将 Discussions 部分打上对号,然后建立一个 Announcements 的分类
进入 Giscus 配置
链接在这:**giscus**
配置完仓库和 discussion 分类后,可以在启动 giscus 下边复制几个东西
1 | repo: |
还可根据自己的需要在 option 中添加对应的选项,按照 yaml 格式填入
1 | data-strict: 1 |
注意事项
在 Hexo 中,评论功能默认在所有页面都开启,如果部分页面我们不需要评论功能,例如分类、标记页面。我们可以在在站点根目录下 /source/页面名称/index.md 中通过 comments 属性设置 true 或 false 控制该页面或者是文章的评论功能是否打开
收录谷歌、百度
1、 查看收录情况:
1 | 地址栏输入:site:xingjiahui.top |
2、验证、提交网站:JingLisen
PWA
记录hexo整合pwa的使用 | 小五的个人杂货铺 (xiaowu95.wang)
Butterfly 安裝文檔(四) 主題配置-2 | Butterfly
SEO
百度主动提交链接
1、首先,在 Hexo 根目录下,安装本插件:
1 | npm install hexo-baidu-url-submit --save |
2、然后在根目录下,把以下内容配置到 _config.yml 文件中:
1 | deploy: |
我把 deploy 配置也贴出来是因为有两个 type,注意用 - 区分
百度其它的 seo 到他的官网看文档就行
查看网页 RSS
本次修改基于 Butterfly 主题 3.0.0 !
实现:增加社交图标 RSS,点击可查看网页 RSS。
1.下载插件 hexo-generator-feed
1 | npm install hexo-generator-feed --save |
2.在 hexo 的主配置文件 _config.yml 中任意位置添加以下代码:
1 | feed: |
3.修改 butterfly 主题配置文件 _config.yml ,添加 RSS 的图标:
1 | social: |
社交信息设置
在 \source\_data 中的 butterfly.yml 修改 social:
(可以选择使用 fa fa-xxx 图标,也可以选择使用 阿里iconfont 图标)
此处要注意:
很多人不知道自己上方填的网址怎么找
RSS 上面有教程,Giuhub、Github、CSDN、bilibili 直接 个人主页 网址就可以
QQ:下方 xxxxxxx 填上对应的 qq号码 即可
1 | tencent://AddContact/?fromId=45&fromSubId=1&subcmd=all&uin=xxxxxxx&website=www.oicqzone.com |
注意事项
有时浏览器会缓存旧的链接或搜索结果,无法加载更新后的结果,可使用使用 Ctrl + F5 强制刷新页面,或清除缓存并刷新页面,如缓存图片和文件。